
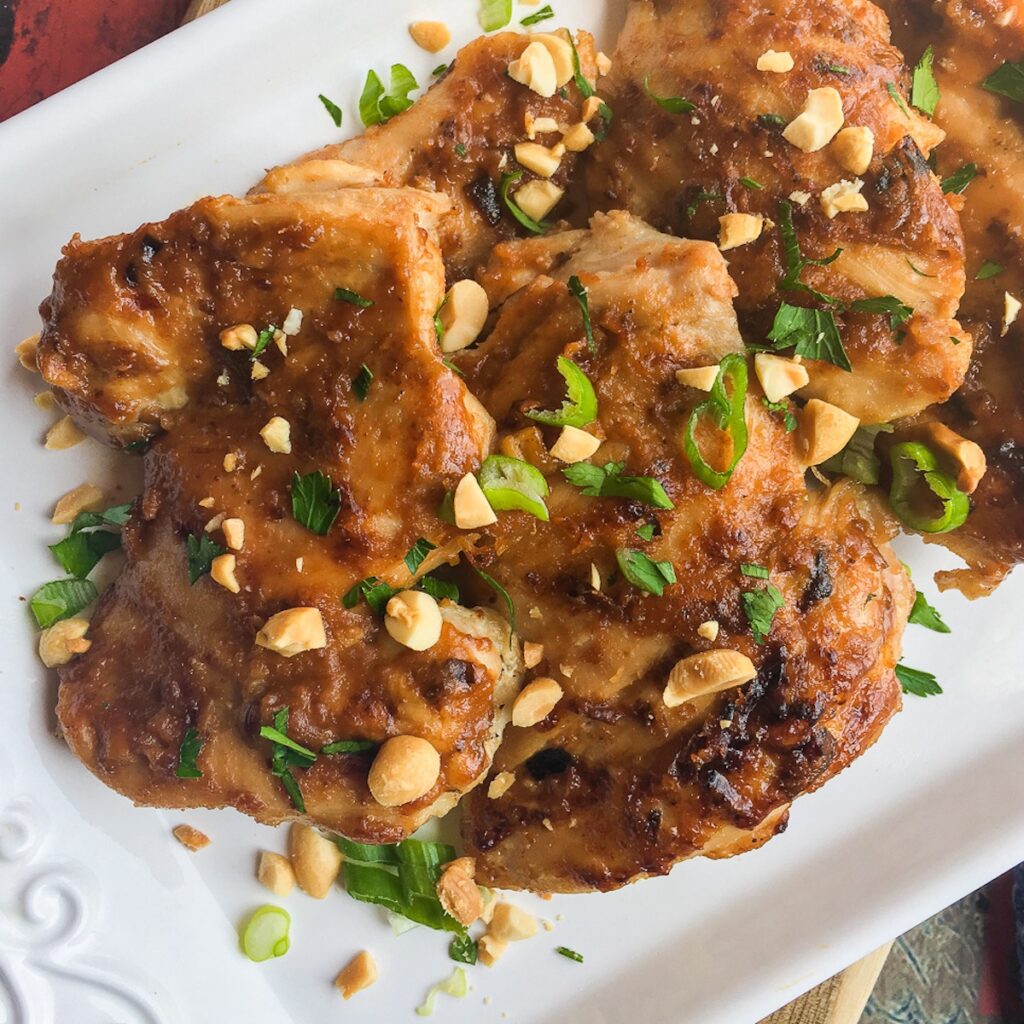
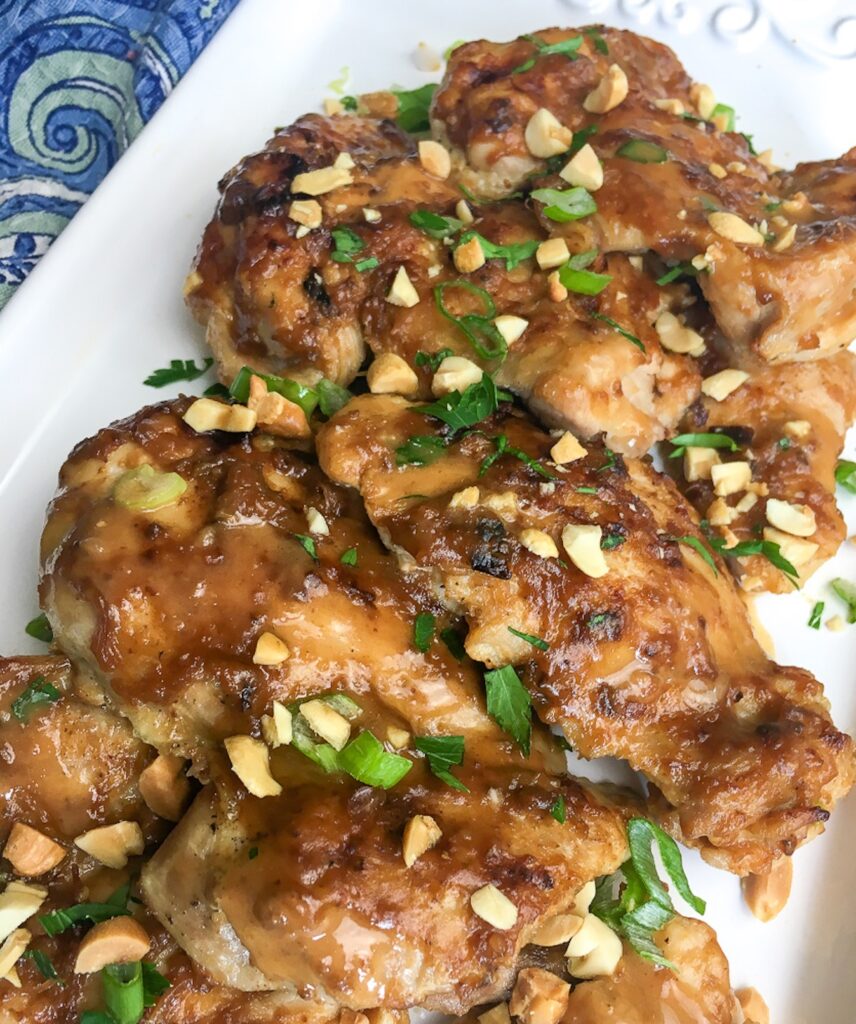
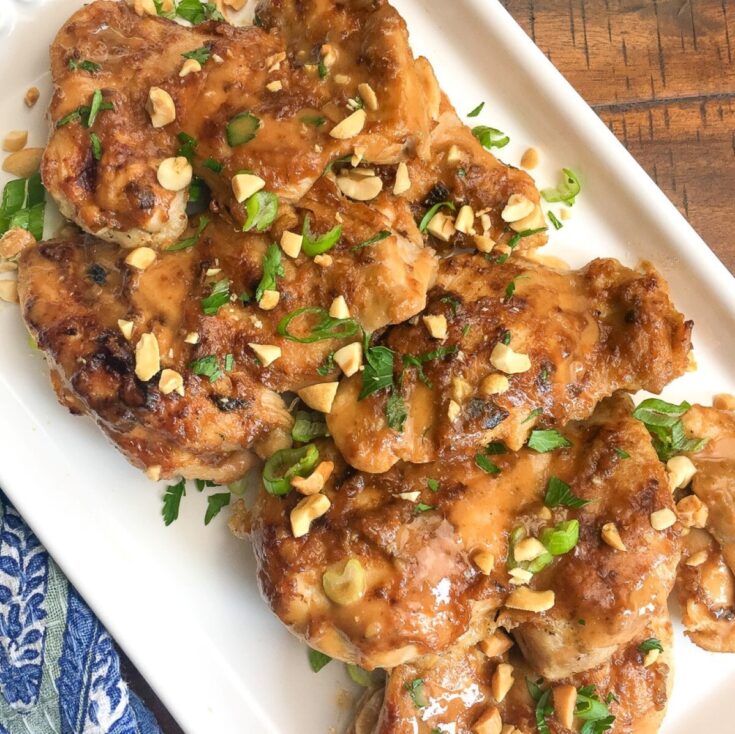
These flavorful Instant Pot Thai chicken thighs are perfect for dinner. With just a10 minute cooking time, this is a great way introduce Thai cuisine to your household. Leftovers can be shredded to make healthy and delicious wraps for lunch the next day.
One trick to this chicken thigh recipe is to add enough liquid to the peanut sauce prior to cooking. If the sauce is too thick, the Instant Pot may not be able to reach adequate pressure. So, if you decide to add more peanut butter, be sure to adjust the amount of liquid, as well.
What is an Instant Pot?
An Instant Pot is a kitchen appliance that functions as a pressure cooker, slow cooker, rice cooker, and steamer. It has a number of preset cooking programs, as well as the ability to be programmed manually. It’s so versatile it will quickly become one of your most useful kitchen appliances!
This article includes affiliate links
Ingredients
- 2 tablespoons sesame oil
- 2 lbs. boneless skinless chicken thighs
- 2/3 cups chicken stock
- ¼ cups sugar-free peanut butter
- ¼ cups gluten-free soy sauce or coconut aminos
- 2 tablespoons fresh lime juice
- 2 tablespoons honey, preferably local
- 1½ tablespoons Sriracha sauce
- 2 t. fresh ginger
- 1 t. garlic powder
- Sea salt and black pepper, to taste
Garnish:
- Fresh cilantro, chopped
- ½ cup roasted peanuts, chopped
- 3-4 green onions, cut into thin slices
Equipment
- Instant Pot
- Cutting board and knife
- Platter
Instructions
- Add sesame oil to Instant Pot and set the “Sauté” setting to high. Working in batches, if necessary, brown the chicken thighs, approximately 3-4 minutes per side. Repeat this process with remaining thighs. Remove and set aside on a platter.
- Pour chicken broth into hot container and gently scrape up brown bits from bottom.
- Add peanut butter to the hot liquid and stir until completed melted. Add soy sauce, lime juice, honey, Sriracha sauce, ginger, and garlic powder. Season with salt and black pepper, to taste, and stir to combine.
- Add metal rack to the Instant Pot and place the browned chicken thighs on top.
- Add lid and lock into place. Switch vent to “Sealing” position and set the “Manual” setting on high before adjusting the cook time to 10 minutes. After a brief pause, the Instant Pot will automatically start building pressure.
- When finished, do a quick release (QR) to allow the pressure to escape. Unlock and carefully remove lid when finished and transfer the chicken to a platter.
- Optional: To thicken sauce, select the “Sauté” setting and heat, stirring continually, until the excess liquid is reduced and the sauce reaches the desired consistency.
- Turn Instant Pot off and return the chicken pieces and the juices that accumulated on the platter to the sauce and turn to coat.
- Remove chicken and transfer to a serving tray. Garnish with chopped fresh cilantro, chopped peanuts, and green onions, if desired. Serve immediately with extra peanut sauce and your favorite sides. Enjoy!
Cooking Tips
- To get the nice browning effect shown in these images, transfer these flavorful chicken thighs to a large, rimmed baking sheet lined with aluminum foil after cooking. Brush each side generously with the peanut sauce and place under a broiler set to high for 2-3 minutes or until nicely browned.
Goes well with (other dishes)
Enjoy this delicious Thai food with either jasmine rice, brown rice, white rice or even cauliflower rice.
Storage Instructions
Take your leftover Thai chicken thighs and store in an airtight container. Refrigerate and they should be good for up to four days.
You May Also Like
Bragging Rights
We would love to see what you did with this recipe!
Comment below or share your photo @flavorportal / #flavorportal
Instant Pot Thai Chicken Thighs
These flavorful Instant Pot chicken thighs are perfect for dinner. With just a10 minute cooking time, this is a great way introduce Thai cuisine to your household. Leftovers can be shredded to make healthy and delicious wraps for lunch the next day.
One trick to this chicken thigh recipe is to add enough liquid to the peanut sauce prior to cooking. If the sauce is too thick, the Instant Pot may not be able to reach adequate pressure. So, if you decide to add more peanut butter, be sure to adjust the amount of liquid, as well.
Ingredients
- 2 tablespoons sesame oil
- 2 lbs. boneless skinless chicken thighs
- 2/3 cups chicken stock
- ¼ cups sugar-free peanut butter
- ¼ cups gluten-free soy sauce or coconut aminos
- 2 tablespoons fresh lime juice
- 2 tablespoons honey, preferably local
- 1½ tablespoons Sriracha sauce
- 2 t. fresh ginger
- 1 t. garlic powder
- Sea salt and black pepper, to taste
- Garnish:
- Fresh cilantro, chopped
- ½ cup roasted peanuts, chopped
- 3-4 green onions, cut into thin slices
Instructions
- Add sesame oil to Instant Pot and set the “Sauté” setting to high. Working in batches, if necessary, brown the chicken thighs, approximately 3-4 minutes per side. Repeat this process with remaining thighs. Remove and set aside on a platter.
- Pour chicken broth into hot container and gently scrape up brown bits from bottom.
- Add peanut butter to the hot liquid and stir until completed melted. Add soy sauce, lime juice, honey, Sriracha sauce, ginger, and garlic powder. Season with salt and black pepper, to taste, and stir to combine.
- Add metal rack to the Instant Pot and place the browned chicken thighs on top.
- Add lid and lock into place. Switch vent to “Sealing” position and set the “Manual” setting on high before adjusting the cook time to 10 minutes. After a brief pause, the Instant Pot will automatically start building pressure.
- When finished, do a quick release (QR) to allow the pressure to escape. Unlock and carefully remove lid when finished and transfer the chicken to a platter.
- Optional: To thicken sauce, select the “Sauté” setting and heat, stirring continually, until the excess liquid is reduced and the sauce reaches the desired consistency.
- Turn Instant Pot off and return the chicken pieces and the juices that accumulated on the platter to the sauce and turn to coat.
- Remove chicken and transfer to a serving tray. Garnish with chopped fresh cilantro, chopped peanuts, and green onions, if desired. Serve immediately with extra peanut sauce and your favorite sides. Enjoy
Notes
- To get the nice browning effect shown in these images, transfer these flavorful chicken thighs to a large, rimmed baking sheet lined with aluminum foil after cooking. Brush each side generously with the peanut sauce and place under a broiler set to high for 2-3 minutes or until nicely browned.
- Take your leftover Thai chicken thighs and store in an airtight container. Refrigerate and they should be good for up to four days.